Rather watch than read? All of it in 82 seconds.
A client calls or sends a message: "When can I come in?" In StudioTrackr you book that appointment in a few taps, right in the Calendar. A session in the future is a planned session: it sits in your calendar, but it has no price yet. You add that after the appointment, when you complete the session.
Below are the three ways to plan. Pick whichever fits the moment.
Way 1Tap the calendar
The quickest way when you already know when the client is coming.
- 1Open the Calendar. The week view shows your whole week at a glance, every artist in their own colour. Planned sessions have a dashed border, completed sessions are filled.
- 2Tap an empty spot. Pick the time the client is coming in.
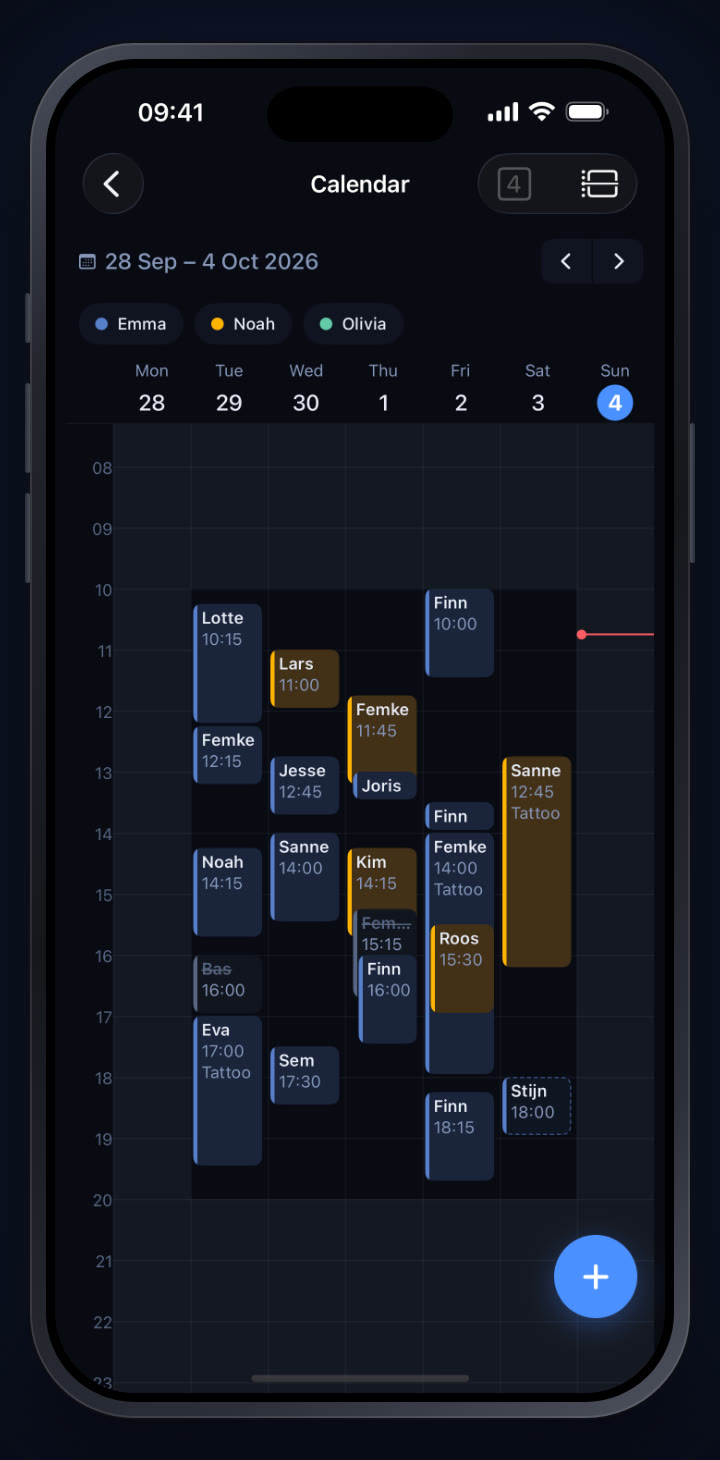
- 3A small sheet opens. The spot you tapped shows as a dashed block in the calendar, and the sheet already shows the day, time and artist. So you see right away whether it fits.
- 4Tapped the wrong spot? Just tap another spot in the calendar and the appointment moves with it.
- 5Tap Add a client. The full form opens with the cursor straight in the search field.
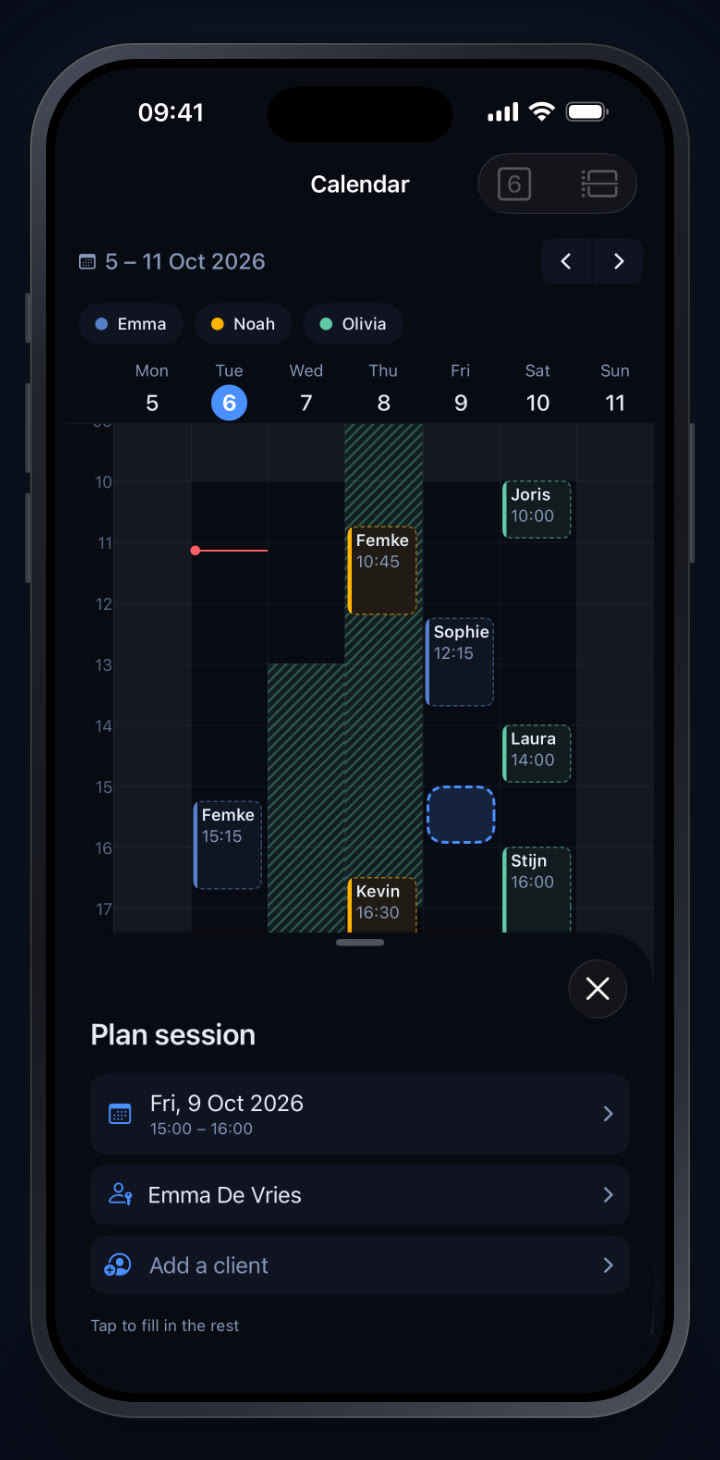
- 6Search and pick the client. Type a few letters of their name. New client? Add them right there. Artist, service and tags work like they do for any session.
- 7No price yet. The payment block is locked: you add the price when you complete the session.
- 8Tap Plan session. The session shows up in your calendar right away, with a dashed border. If you put your sessions in Google Calendar, it appears in the artist's calendar within seconds too.
Way 2The + button
Handy when you already have the day in front of you, but still need to agree on a time.
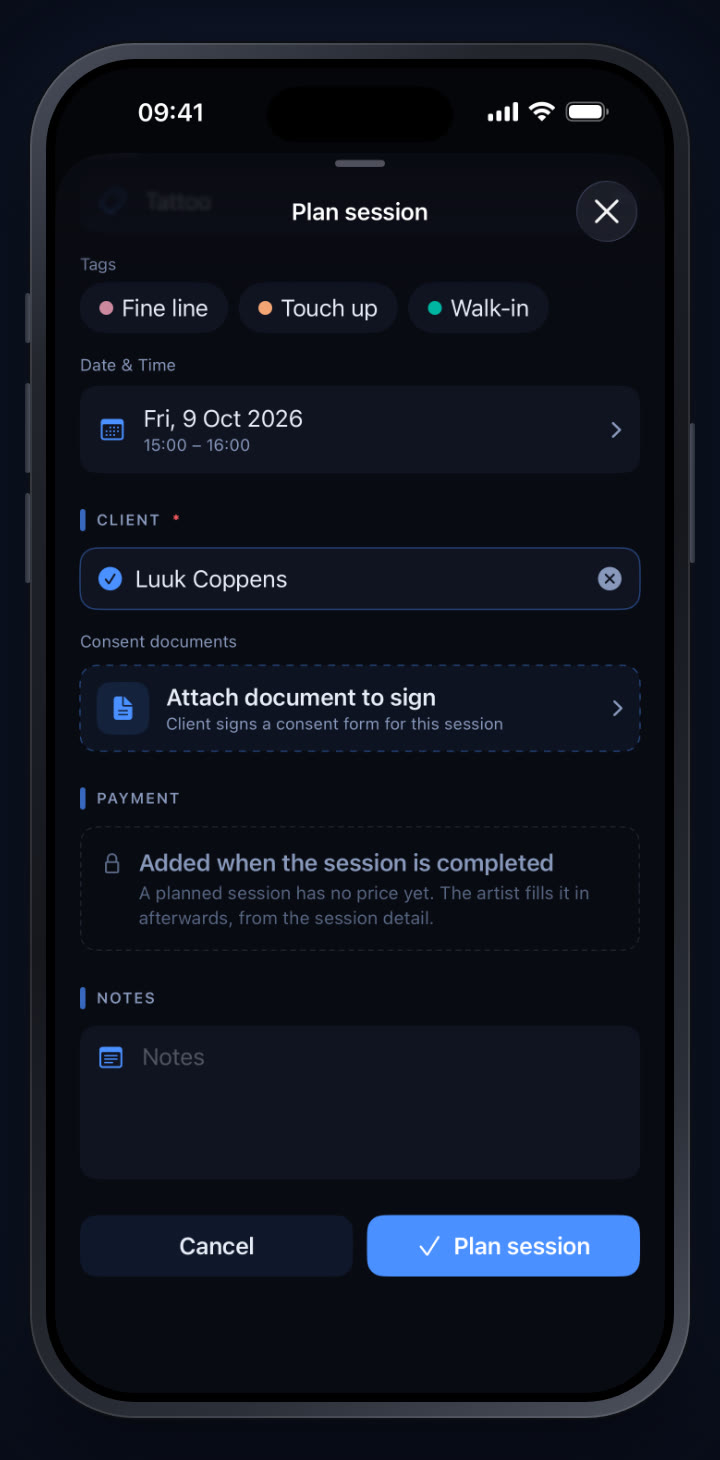
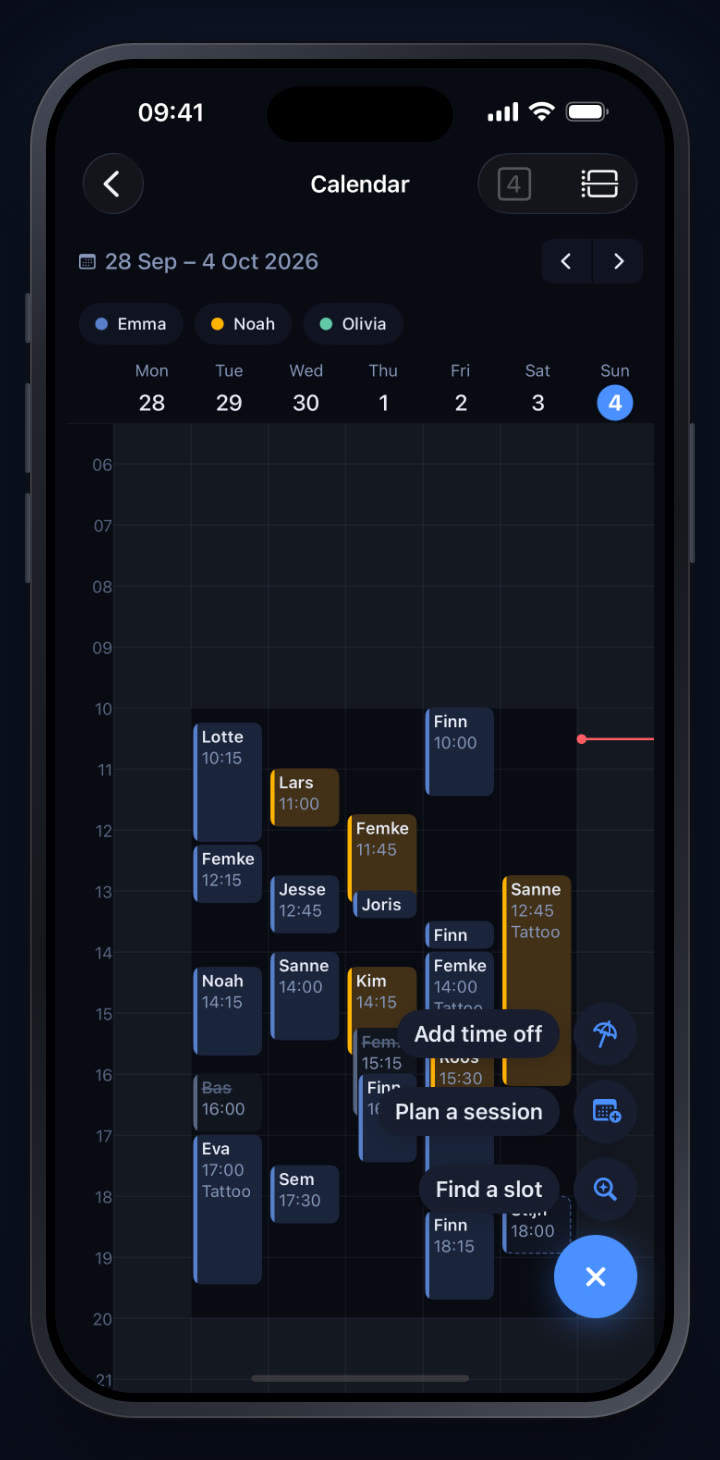
- 1Tap the + button at the bottom right of the calendar. A menu opens with Plan a session, Add time off and Find a slot.
- 2Choose Plan a session. The form starts on the day you're looking at (today, when today is on screen). You pick the time yourself.
- 3Add the client and save, just like in way 1.
Way 3Find a free slot
No idea when there's room? Let StudioTrackr look. The slot finder takes opening hours, every artist's working week, time off and all sessions already planned into account.
- 1Tap + and choose Find a slot.
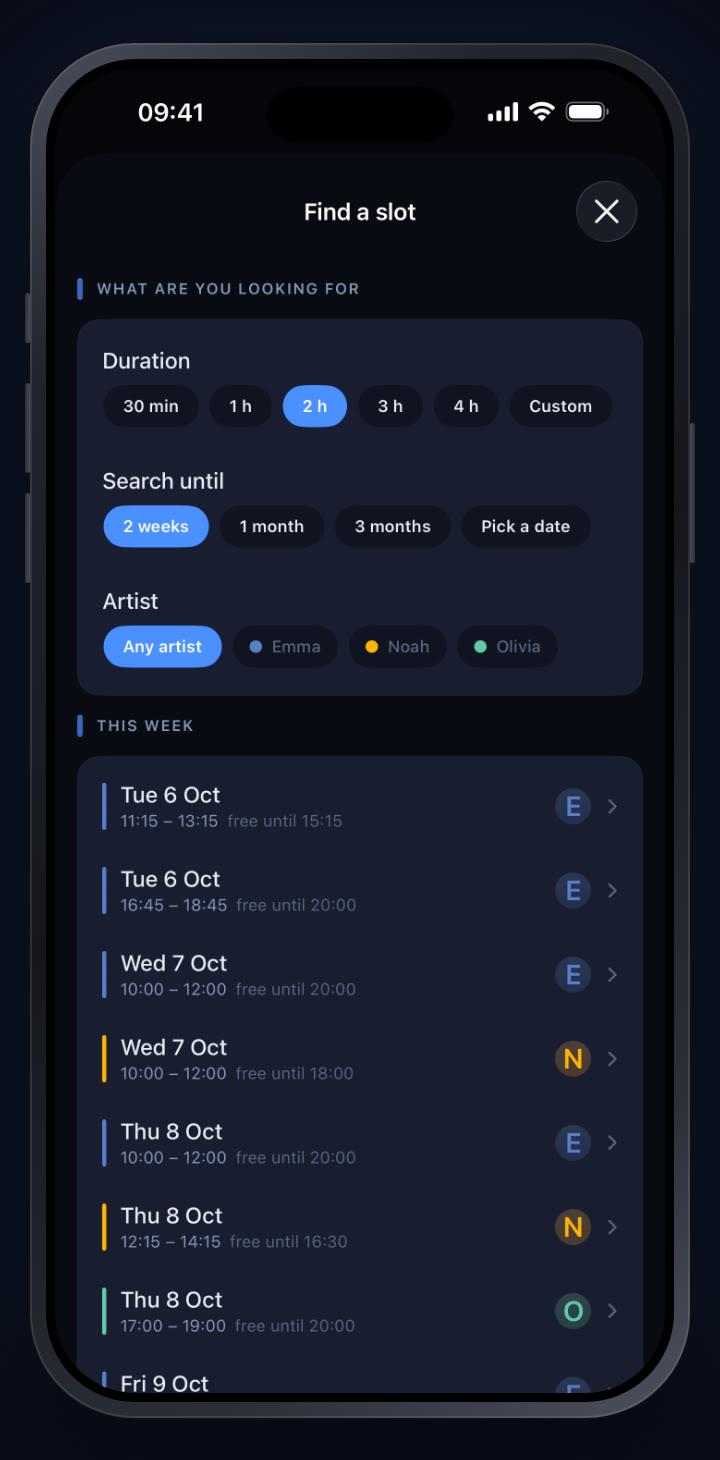
- 2Choose what you need: how long the session takes (30 minutes to 4 hours, or Custom for a longer sitting), how far ahead to look and which artist. Any artist is the default, because the client mostly wants a date.
- 3Pick a free slot. Every opening is listed by week, with how long it stays free (for example "free until 18:00").
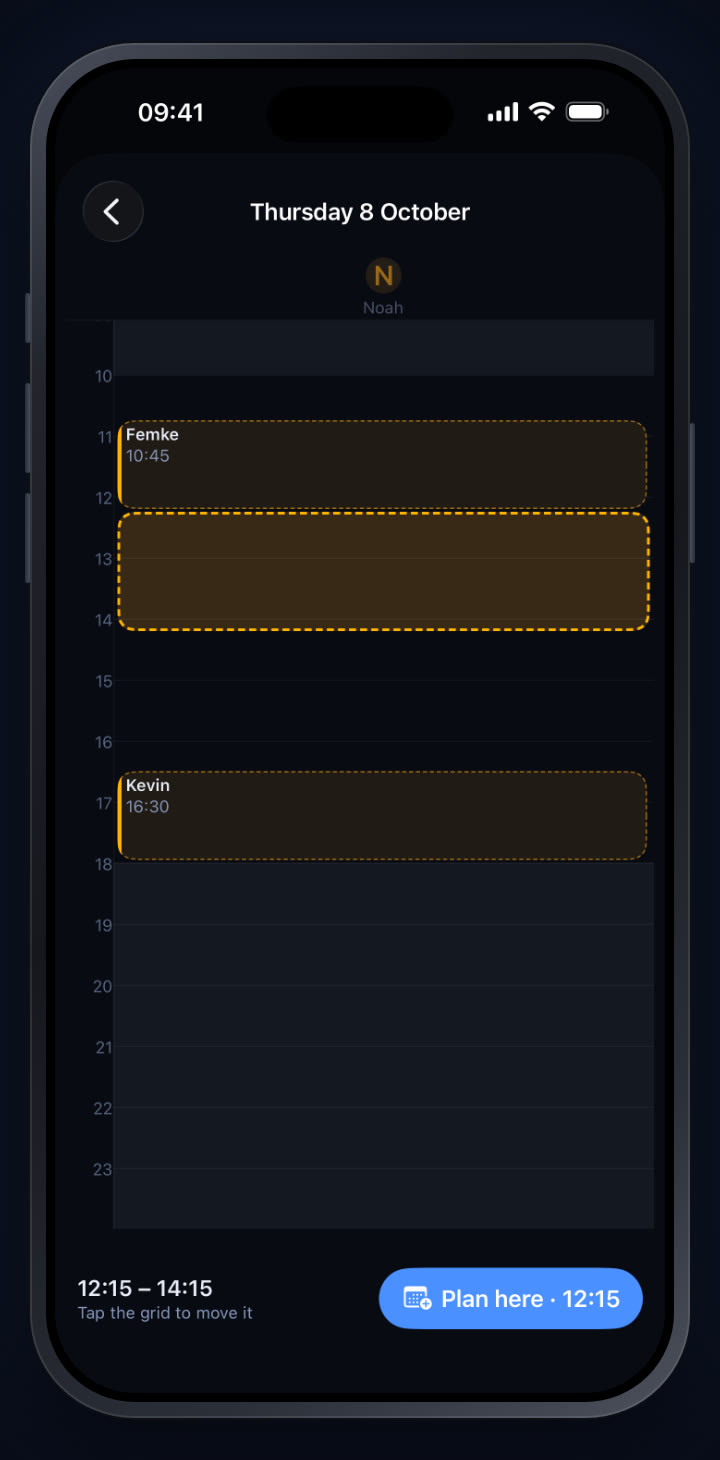
- 4Check it on the day. Tapping plans nothing yet: you see the proposal as a dashed block on that artist's day, next to the sessions already there.
- 5Move it if needed. Tap the grid to shift the proposal to another time. The length stays the same.
- 6Tap Plan here. Date, time and artist are filled in. Pick the client and tap Plan session.
FinallyAfter the appointment: complete it
A planned session only counts towards your revenue once you complete it. You do that after the appointment, in a few seconds.
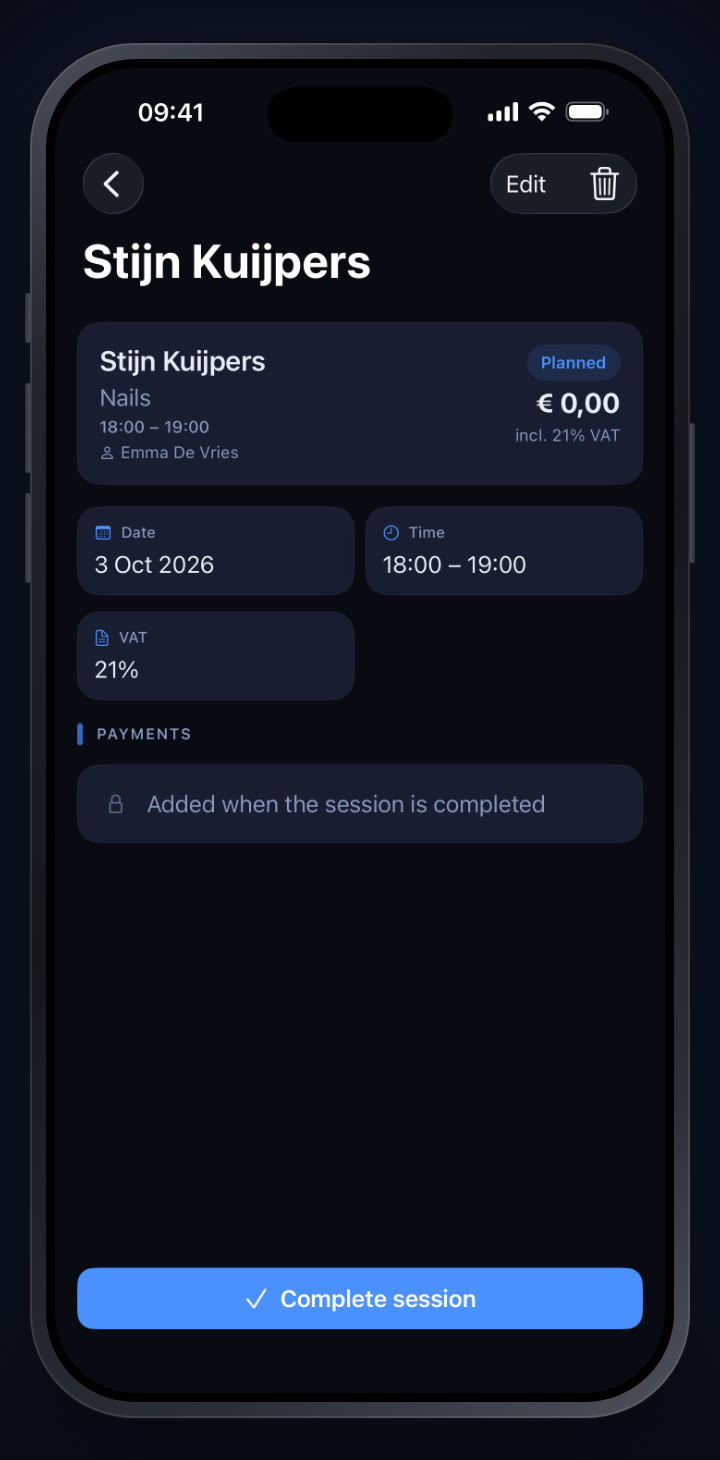
- 1Open the session. It carries the Planned badge. Once the session has started, a Complete session button appears at the bottom.
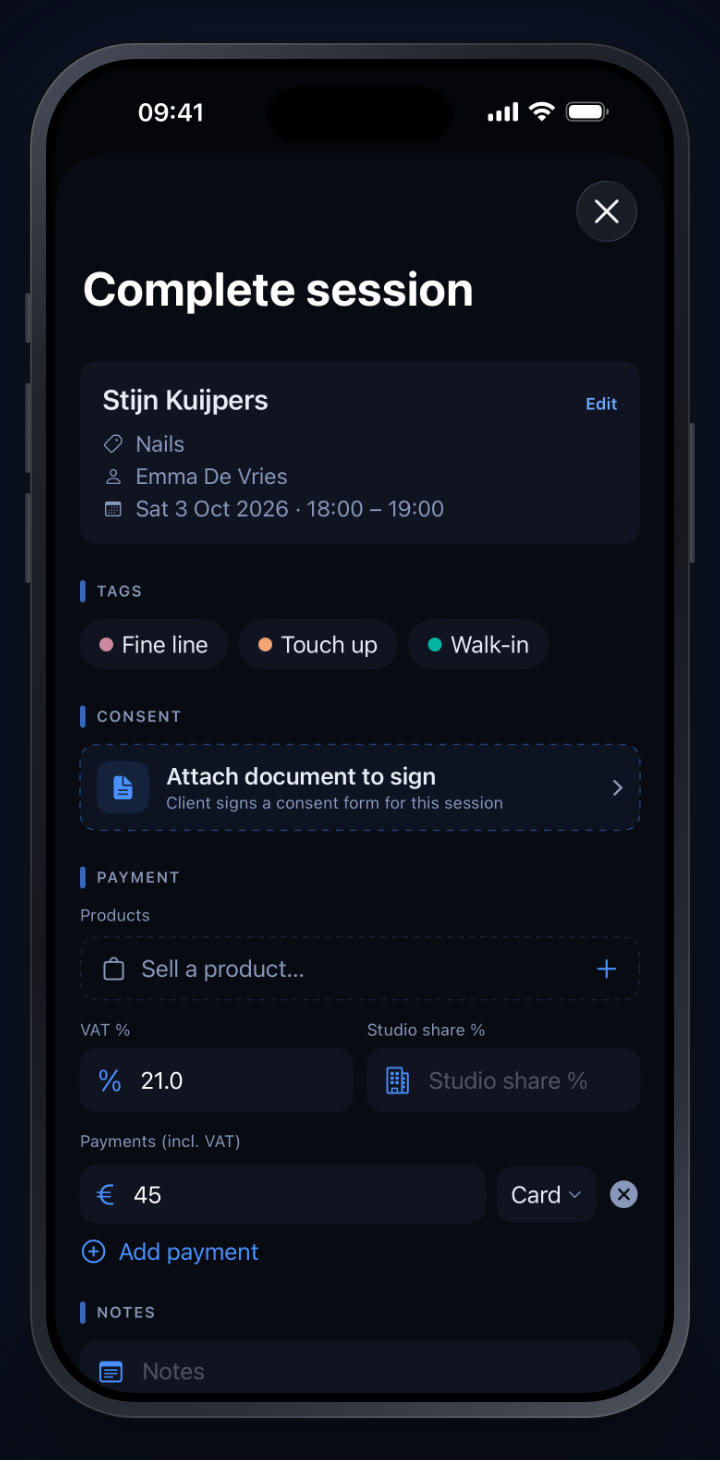
- 2Tap Complete session. A short screen opens: what was already decided (client, service, artist, date and time) sits at the top in a summary.
- 3Add the payment. Enter what the client paid and how: cash, card, Payconiq or bank transfer. You can still adjust tags, products, VAT and studio share here too.
- 4Save. Done: the session is completed and now counts towards your revenue and your dashboard.
Want more? Our other how-tos each take a closer look at another part of StudioTrackr, such as getting a consent form signed digitally. Got a question, or a topic we should definitely cover? Let us know.
Try it yourself in StudioTrackr
Available for iPhone, iPad and Mac. Monthly plans start with a 7-day free trial.